Misla

Floating-plant corner barrier, made to measure

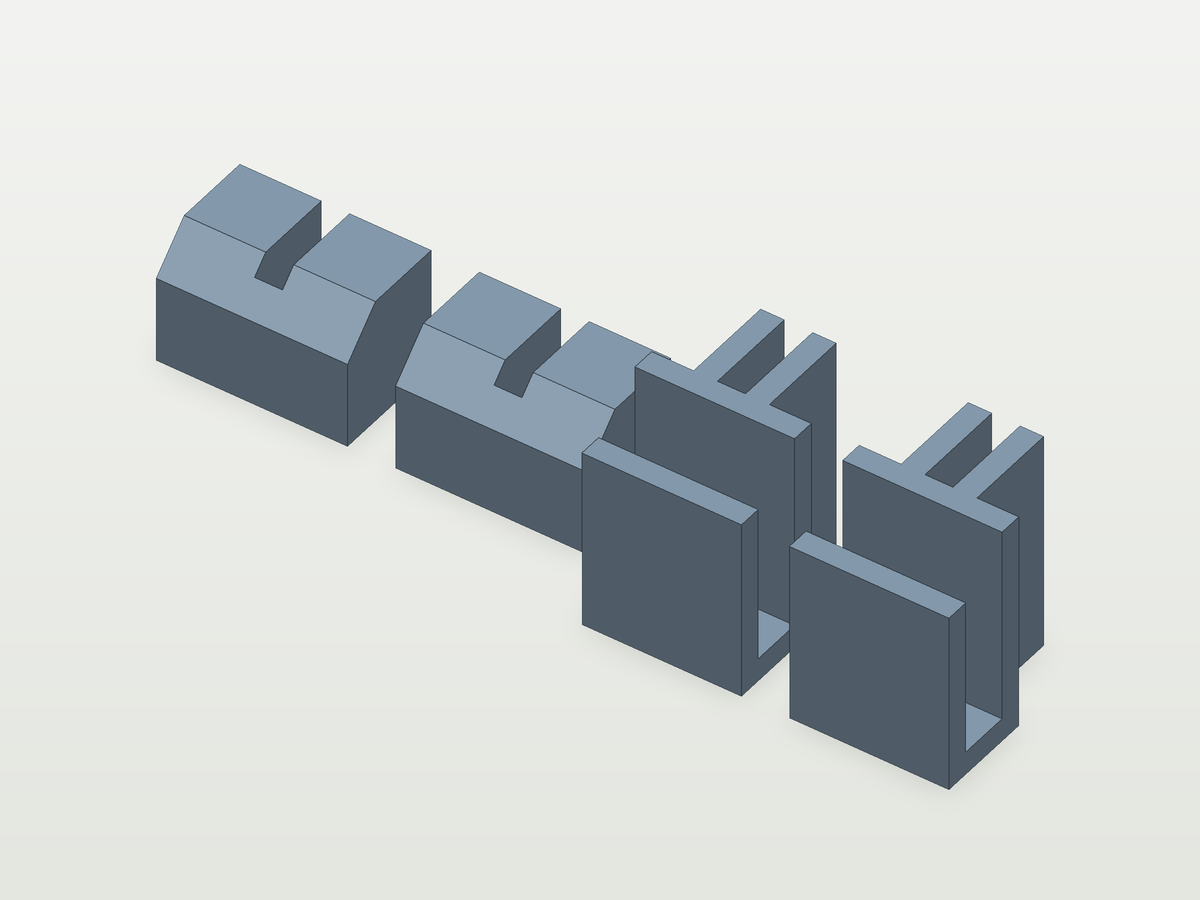
Measure your glass, how far the water sits below its top edge and how far it falls between top-ups, and we will cut a corner pen for your floating plants to fit that tank. The blade is drawn to reach below the lowest level you give us, so it still dips into the water on the day before you top up. It hangs on two clips over the glass, and prints upside down with no supports. Where each end of the blade meets the glass, the clips leave a gap of up to half a millimetre by our calculation: that is narrower than a typical duckweed frond floating flat, but watermeal, the narrowest new fronds and any frond tipped on its edge can slip through there.

Floating-plant corner barrier, made to measure
Rendered at our default measurements — yours comes out to your numbers.
What you need before you start

What it will take

  • Shape of the pen: 2 to choose from
  • Along the left-hand glass: 40–200 mm
  • Along the right-hand glass: 40–200 mm
  • Glass thickness: 3–15 mm
  • From the top of the glass down to the water: 0–80 mm
  • How far the level falls between top-ups: 0–40 mm
  • Nozzle size: 4 to choose from
  • Filament: 4 to choose from

As it comes

Blade reaches below the top of the glass43 mm
Width on the build plate120 mm
Depth on the build plate120 mm
Filament, roughly41 g

Build plate: 121 mm as it comes, never more than 256 mm.

What you need to hand

  • A caliper for the thickness of the glass at its top edge.
  • A ruler for the drop from the top of the glass to the water, with the tank freshly topped up.
  • A rough idea of how far the level falls between top-ups.
  • How far along each glass you want the pen to reach.
  • A corner with the outside of both glasses clear, as deep as the blade goes.
  • Your nozzle size and the filament you will print it in.

The part, drawn to your numbers

120.4 mm46 mm20 mm · 1:2
From the side, as it prints — upside down, with the clips on the plate and the blade standing up from them

Drawn from the numbers in the form below, off the same geometry the file is cut from. It is not a photograph, and there is no photograph — every part that leaves here is a different size.

The corner and the pen

Stand facing the corner. The two lengths are how far along each glass the blade meets it — the size of the pen is your call.

A triangle is one blade across the corner. A square is two blades at a right angle and holds more surface for the same length along the glass.
mm
Stand facing the corner. This is how far from the corner, along the glass on your left, the blade meets that glass.
mm
The same along the glass on your right. Up to 200 mm each way, so the part prints in one piece with no joins.
Your glass and your water

Three things only your tank can tell you. Measure with the tank freshly topped up; the fall is the most it goes down before you top it up again.

mm
Measure the top edge of the glass itself with a caliper, where the two clips will sit, and include any background film stuck to the outside there. The clips sit over a bare glass edge, so this is for a rimless tank or one where the top edge is exposed.
mm
With the tank freshly topped up: the drop from the top edge of the glass to the surface of the water.
mm
The most the water goes down before you top it up again. The blade has to reach below that, or the plants slip underneath it on the last day.
The printer it will come off

These two are facts about your bench, and both have a right answer already filled in. They decide whether the blade comes out the thickness we drew, which is why we ask.

The nozzle you will print with. It does not change the model — it decides whether the blade comes out the thickness we drew.
Sets the weight estimate, and flags PLA, which is for a dry fit only. It does not change the model.
Finer adjustments
mm
How much wider than the glass the slot of each clip is drawn. Printed slots usually come out a little narrower than drawn, so the gap on your print is this or less. Looser clips go on more easily, but the part can lean further and the ends of the blade can stand further off the glass, so the checks cap it.

More for your tank

  1. Filter intake guard

    A snail-proof box guard for a rear filter intake, cut to the opening you measured.

    What you need A tape or steel rule for the width and height of the opening in the divider glass, and where in the glass it sits.

    Try your numbers

  2. Filter outlet diffuser

    A quiet, snail-proof outlet for a rear filter, cut to your hose and your corner.

    What you need A calliper for the outside of the hose, and the clear space between the hose and the side glass.

    Try your numbers

  3. Tank divider clips

    A pair of clips that line up your own divider sheet in the tank, cut to the thickness of your glass and of your sheet. They rest on the glass by their own weight and do not lock the sheet in place.

    What you need A calliper for the glass at its top edge and for your divider sheet, a ruler for the drop to the water, and the sheet itself.

    Try your numbers

Similar parts: Guards and barriers · Tank glass edge

See all 10 in Aquarium

Reviews

No reviews yet.

Reviews come from subscribers who have downloaded this part.